How is your print quality with lower-opacity designs?
We use up-to-date DTG printing equipment that can produce high-quality color results for gradients and low-opacity images.
You can make a sample order to get an accurate understanding of how these designs look in real life.
Will the colors of the real products come out exactly the same as what they look like on the computer?
The final printed colors could be slightly different than what's displayed in our mockup generator. This is because digital colors are formed by red, green, and blue (RGB), whereas ink colors consist of cyan, magenta, yellow and black (CMYK). The outcome of these two color modes will never be exactly the same, even if they appear so.
We recommend you order a sample to better evaluate the print result.
Do your garments have a smell?
It depends on how the garment is dyed. Reactive-dyed garments are usually smellless. Sometimes acid will be used during the dyeing process to create a faded vintage style, which may result in a slight odor.
What type of ink do you use?
We use environmentally-friendly, water-based inks certified by OEKO-Tex®. These inks can produce significantly bolder and more vibrant colors, ensuring higher accuracy and quality of the print outcome. In addition, their outstanding resistance to chemicals in laundry detergent and scraping of garment hardware keeps the colors from fading after washing.
Which type of printing machine are you using?
The high-performance Brother GTXpro B printer. It features massive print areas up to a 16” x 21”, exceptional print quality, and eco-friendly inks.
What printing methods do you use?
We use the latest DTG printing technology to quickly produce high-quality print results.
How to change mockups that are already synced to stores?
Changing up your mockups from time to time is a smart way to refresh your store and experiment with product images to see how they can help boost your sales.
Here, we’ll take an example of how to replace the mockups that have embroidery designs and are already synced to your store with updated mockups after digitization is complete. Why replace the mockups after digitization? Because this ensures mockups display the products as accurately as possible.
1. In the Dashboard, go to "Stores" and locate the product template you want to update the mockups for.
2. Hover over the ellipsis (three dots) on the right side of the row, and click "Edit".
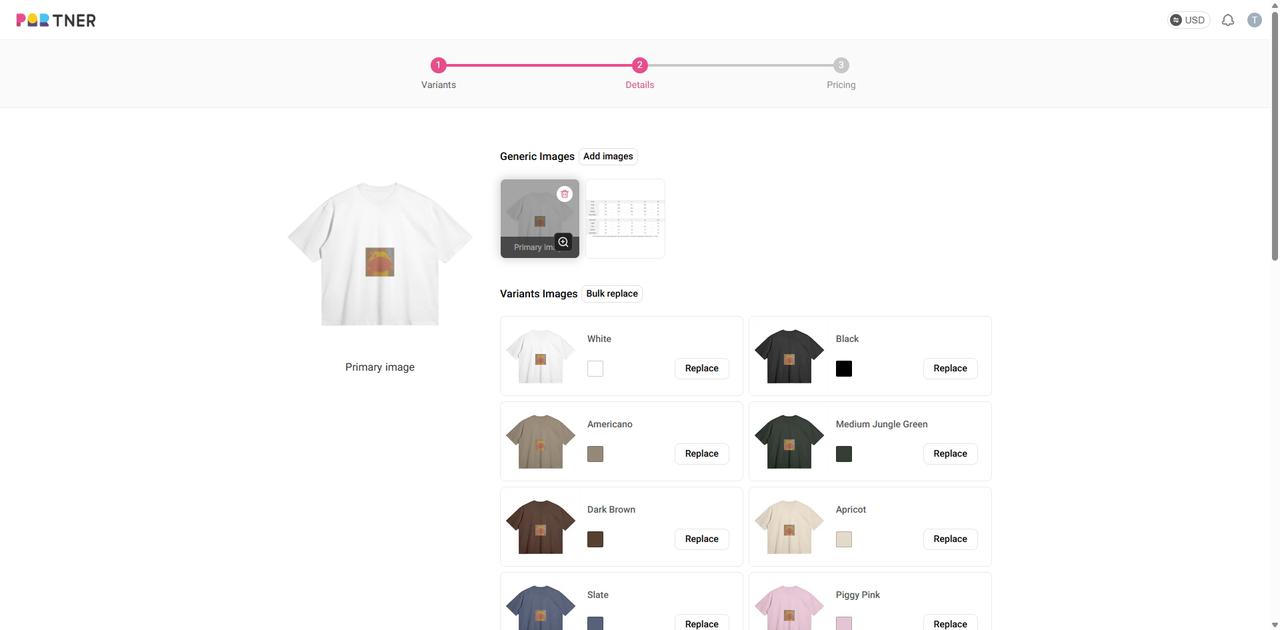
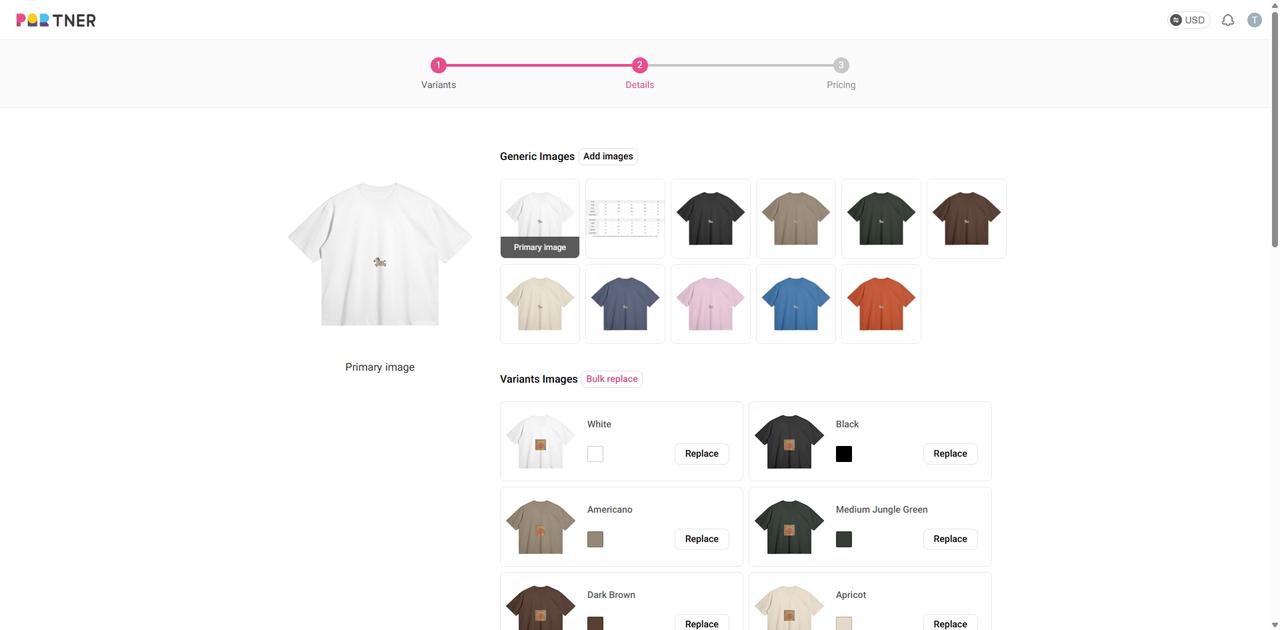
3. On the Details page, you can update both the Generic Images and the Variants Images for the store product.
4. After the embroidery digitization is complete, first delete all existing mockups from the Generic Images section.
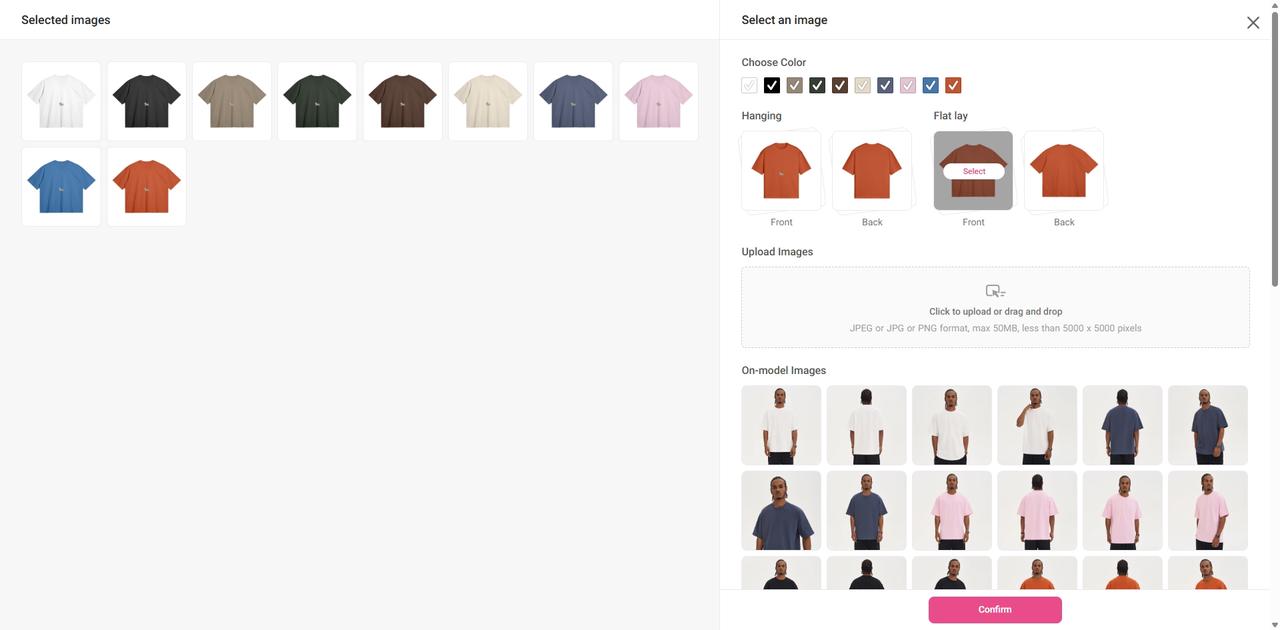
5. Next, click the "Add images" button, and select any mockups under the Hanging or Flat lay — these selected images are your updated embroidery mockups. Once selected, click Confirm.
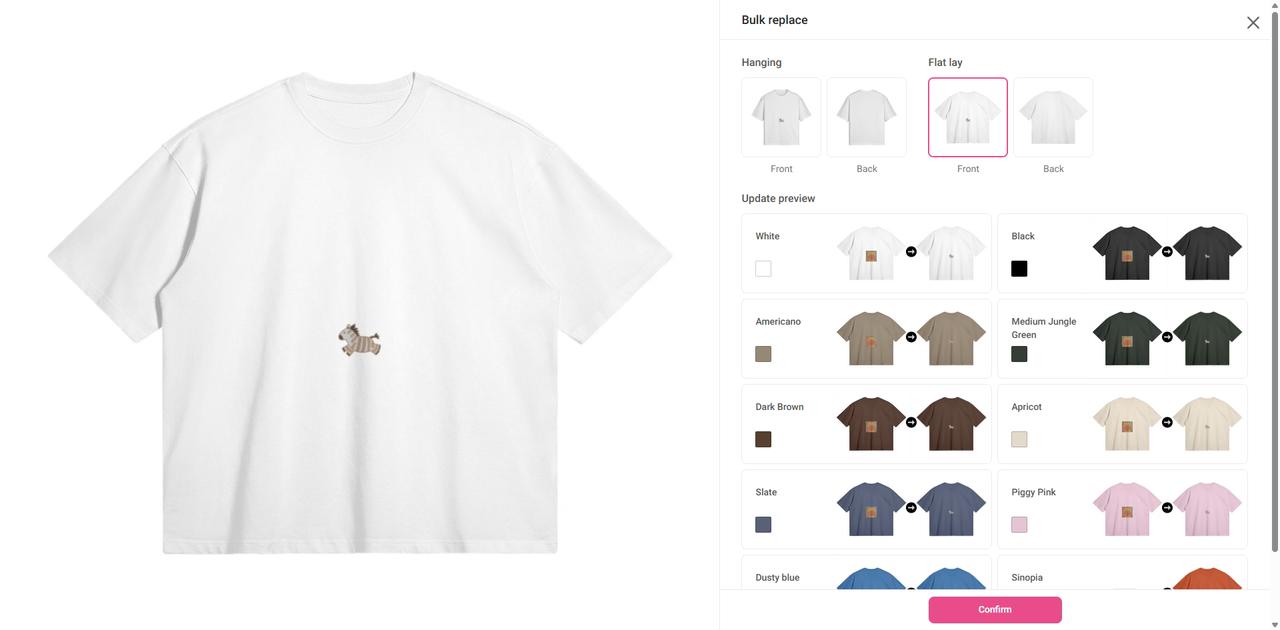
6. Then, to update the mockups for different variants all at once, click the "Bulk replace" button next to the Variants Images.
7. Choose the Hanging or Flat lay mockups again. The images shown on the left side are your updated embroidery mockups. Click Confirm to replace all variant mockups.
Note: To make the difference more visible during testing, we used different designs before and after digitization in our example. In real cases, the change between pre- and post-digitization mockups might be subtler.
8. Scroll to the bottom of the page and click “Proceed to set prices”, then on the next page, click “Continue to publish” to finalize the changes.
How to edit designs that are already synced to Shopify stores?
You can edit synced designs by replacing the existing template with a new, updated product template.
1. First, make sure you've created a new product template with your desired design changes.

2. In your dashboard, go to "Stores," locate the product template you want to update, hover over the three dots icon on the right side of the row, and click "Edit."

3. Delete the original product, then click the "Add Product" button. In the pop-up window, select your desired product template and choose the colors and sizes you want to sync to your store.


4. Select the images and product description you want to sync to your store.

5. Set the selling price and click "Continue to Publish" to complete the update.

How do I create a product bundle for Etsy/Wix/WooCommerce/Squarespace?
With just a few clicks, you can quickly create a bundle of two products and sync them together to your online store as a single listing.
- When adding a product template to your integrated online store, you will see a box titled “Create a product bundle” under the variant settings;
- Click the “Add product” button;
- Choose another product template you want to bundle together from your list of product templates;
- Select variants for the second product;
- Edit color options and rename the colors for your bundle listing so that your customers can easily identify the color variants of each product;
- Select product images and edit product description;
- Link packaging design templates(if needed)
- Set product prices, and you're ready to go!
Watch this tutorial video to learn how to create a product bundle
How often do you update your product catalog?
Our product catalog is updated every one to two months. It takes time to pick the styles and examine the quality, as these two factors are what we value the most when bringing a new product. That being said, we will do our best to offer new arrivals more frequently.

 USD
USD