
 USD
USDHow to change mockups that are already synced to stores?
Changing up your mockups from time to time is a smart way to refresh your store and experiment with product images to see how they can help boost your sales.
Here, we’ll take an example of how to replace the mockups that have embroidery designs and are already synced to your store with updated mockups after digitization is complete. Why replace the mockups after digitization? Because this ensures mockups display the products as accurately as possible.
1. In the Dashboard, go to "Stores" and locate the product template you want to update the mockups for.
2. Hover over the ellipsis (three dots) on the right side of the row, and click "Edit".
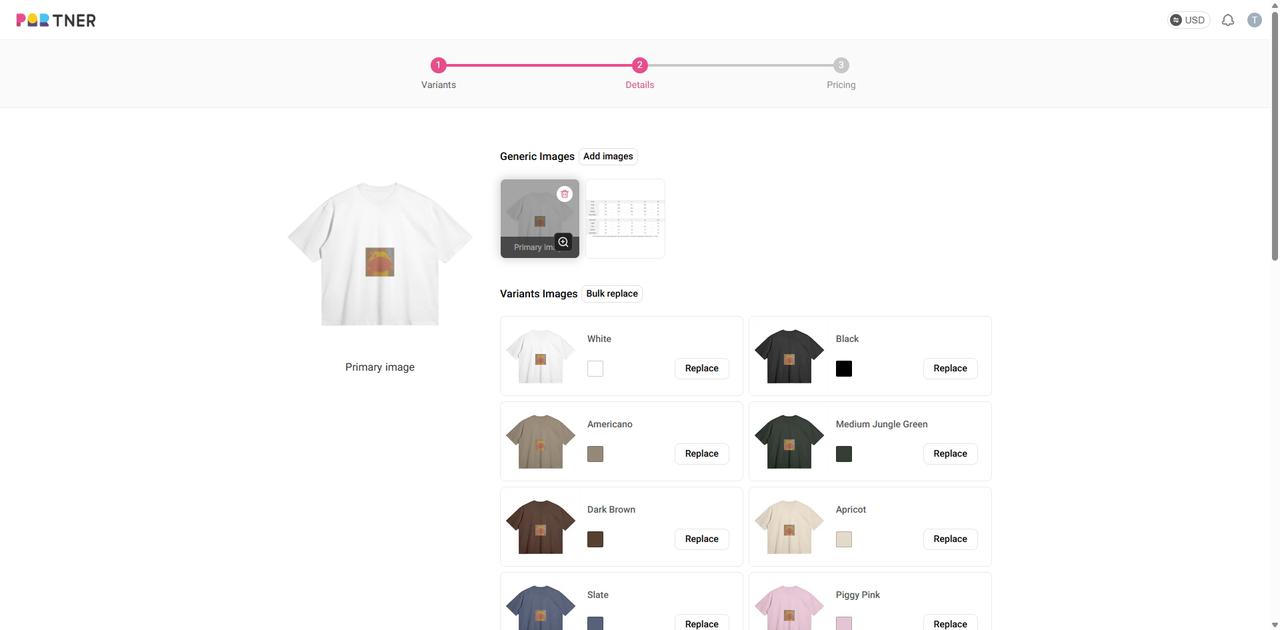
3. On the Details page, you can update both the Generic Images and the Variants Images for the store product.
4. After the embroidery digitization is complete, first delete all existing mockups from the Generic Images section.
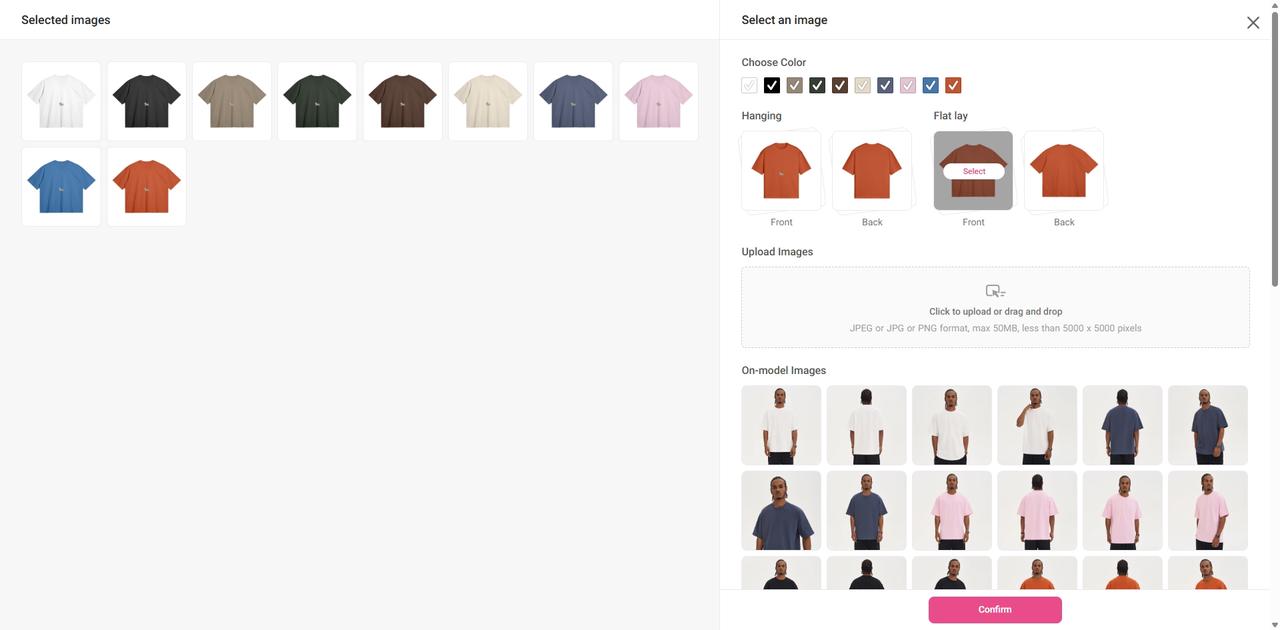
5. Next, click the "Add images" button, and select any mockups under the Hanging or Flat lay — these selected images are your updated embroidery mockups. Once selected, click Confirm.
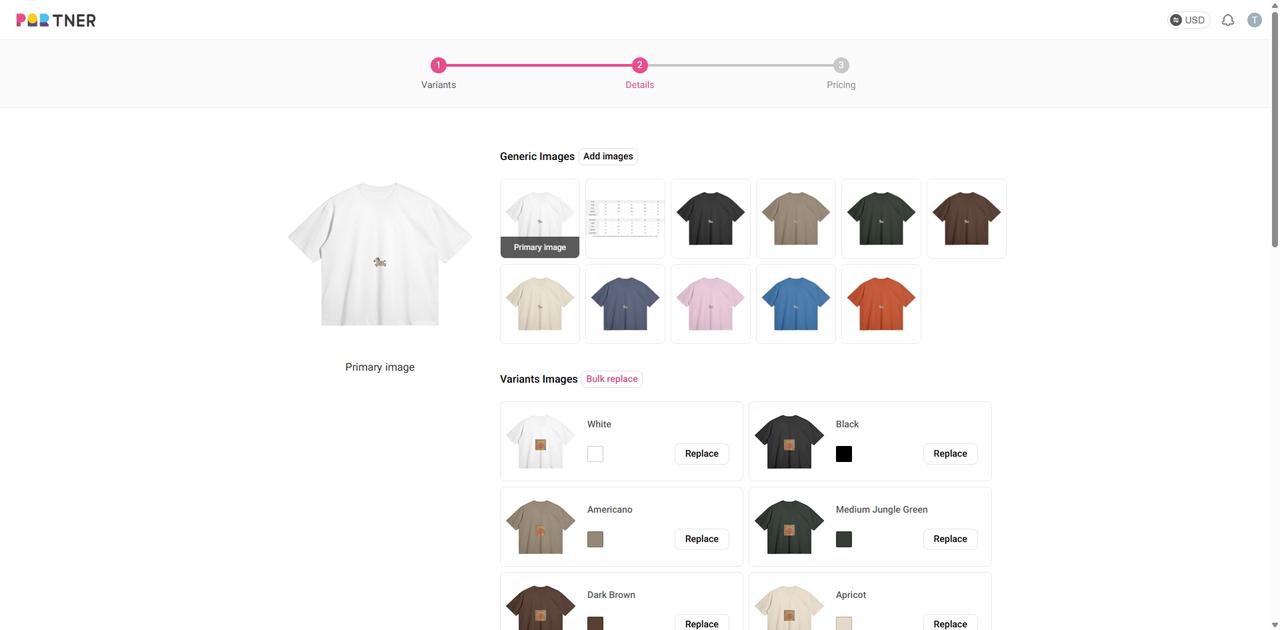
6. Then, to update the mockups for different variants all at once, click the "Bulk replace" button next to the Variants Images.
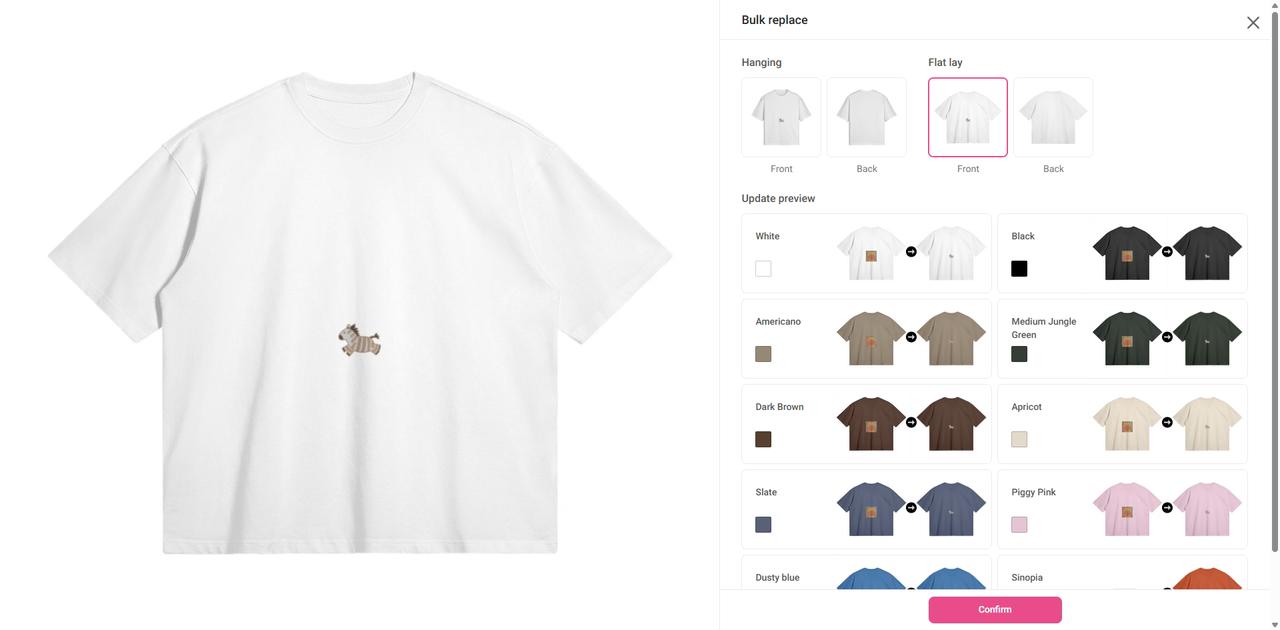
7. Choose the Hanging or Flat lay mockups again. The images shown on the left side are your updated embroidery mockups. Click Confirm to replace all variant mockups.
Note: To make the difference more visible during testing, we used different designs before and after digitization in our example. In real cases, the change between pre- and post-digitization mockups might be subtler.
8. Scroll to the bottom of the page and click “Proceed to set prices”, then on the next page, click “Continue to publish” to finalize the changes.