How to change mockups that are already synced to stores?
Changing up your mockups from time to time is a smart way to refresh your store and experiment with product images to see how they can help boost your sales.
Here, we’ll take an example of how to replace the mockups that have embroidery designs and are already synced to your store with updated mockups after digitization is complete. Why replace the mockups after digitization? Because this ensures mockups display the products as accurately as possible.
1. In the Dashboard, go to "Stores" and locate the product template you want to update the mockups for.
2. Hover over the ellipsis (three dots) on the right side of the row, and click "Edit".
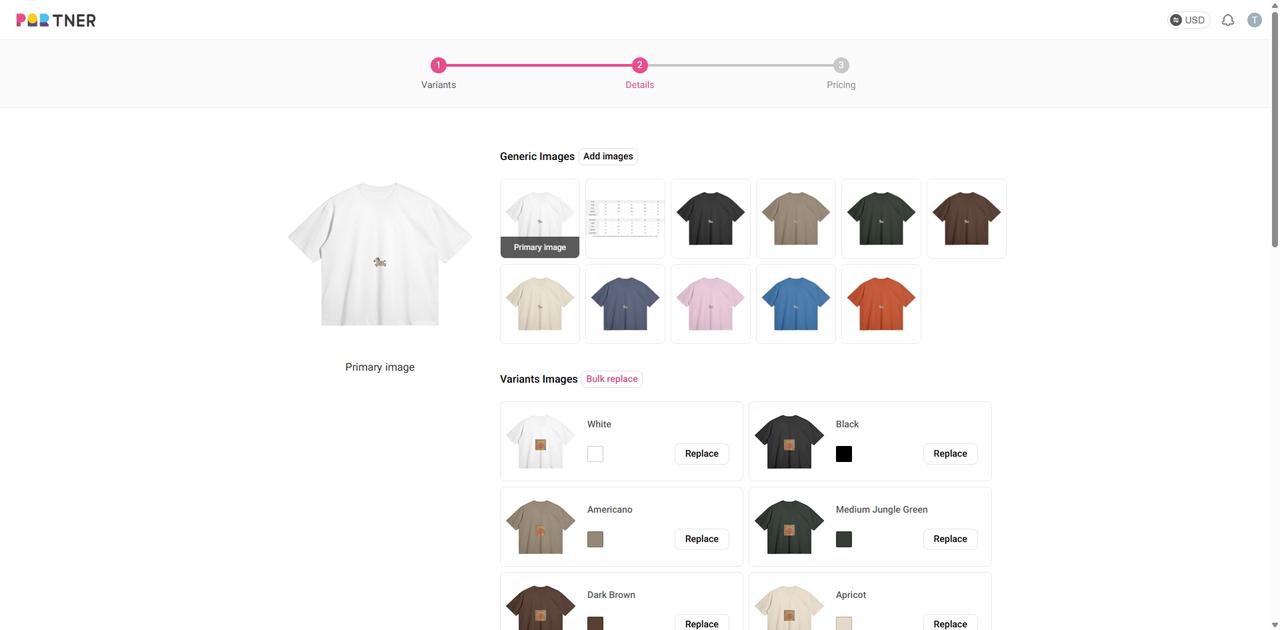
3. On the Details page, you can update both the Generic Images and the Variants Images for the store product.
4. After the embroidery digitization is complete, first delete all existing mockups from the Generic Images section.
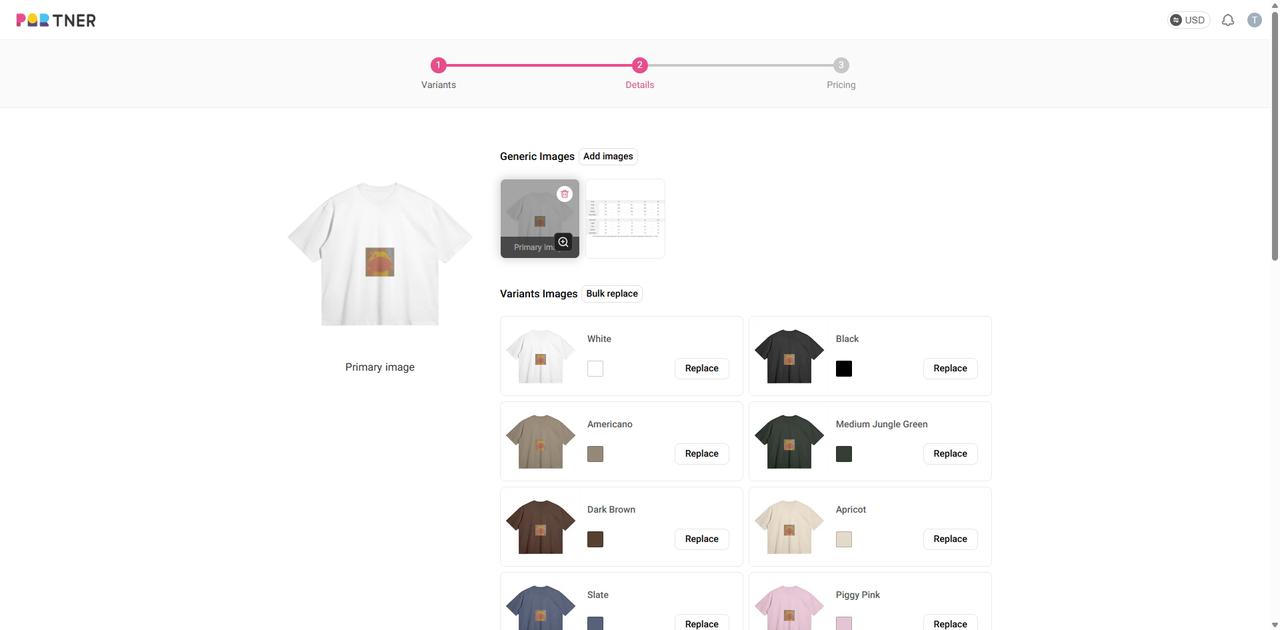
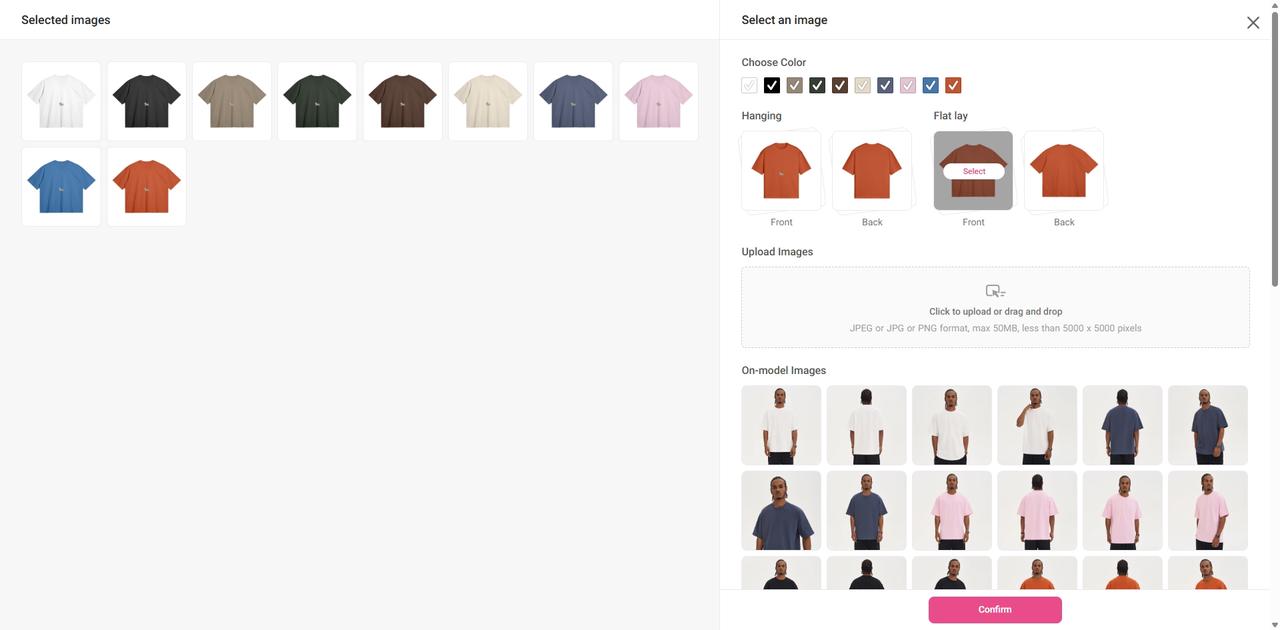
5. Next, click the "Add images" button, and select any mockups under the Hanging or Flat lay — these selected images are your updated embroidery mockups. Once selected, click Confirm.
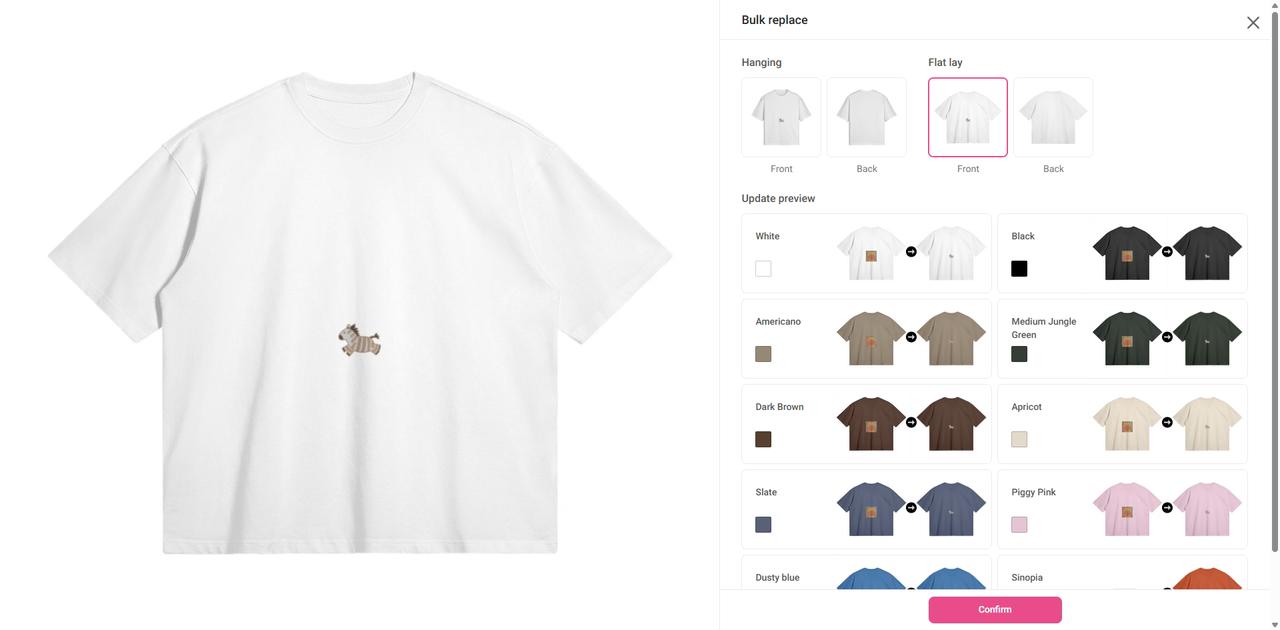
6. Then, to update the mockups for different variants all at once, click the "Bulk replace" button next to the Variants Images.
7. Choose the Hanging or Flat lay mockups again. The images shown on the left side are your updated embroidery mockups. Click Confirm to replace all variant mockups.
Note: To make the difference more visible during testing, we used different designs before and after digitization in our example. In real cases, the change between pre- and post-digitization mockups might be subtler.
8. Scroll to the bottom of the page and click “Proceed to set prices”, then on the next page, click “Continue to publish” to finalize the changes.
How to edit designs that are already synced to Shopify stores?
You can edit synced designs by replacing the existing template with a new, updated product template.
1. First, make sure you've created a new product template with your desired design changes.

2. In your dashboard, go to "Stores," locate the product template you want to update, hover over the three dots icon on the right side of the row, and click "Edit."

3. Delete the original product, then click the "Add Product" button. In the pop-up window, select your desired product template and choose the colors and sizes you want to sync to your store.


4. Select the images and product description you want to sync to your store.

5. Set the selling price and click "Continue to Publish" to complete the update.

How do I create a product bundle for Etsy/Wix/WooCommerce/Squarespace?
With just a few clicks, you can quickly create a bundle of two products and sync them together to your online store as a single listing.
- When adding a product template to your integrated online store, you will see a box titled “Create a product bundle” under the variant settings;
- Click the “Add product” button;
- Choose another product template you want to bundle together from your list of product templates;
- Select variants for the second product;
- Edit color options and rename the colors for your bundle listing so that your customers can easily identify the color variants of each product;
- Select product images and edit product description;
- Link packaging design templates(if needed)
- Set product prices, and you're ready to go!
Watch this tutorial video to learn how to create a product bundle
How often do you update your product catalog?
Our product catalog is updated every one to two months. It takes time to pick the styles and examine the quality, as these two factors are what we value the most when bringing a new product. That being said, we will do our best to offer new arrivals more frequently.
Will your styles, colors, and sizes go out of stock?
PODpartner is fully committed to the sustainability of every partnership and strives to ensure consistent, reliable product supply. Therefore, we do not easily discontinue our product styles, colors, or sizes. If a certain product variant temporarily runs out of stock, it will be replenished within a week.
That being said, our ultimate goal is to help you grow a successful clothing line by providing sellable and profitable products. If a product is constantly in very low demand, we might supersede it with a new product showing higher market potential. In this case, we will inform you by email one month before we remove the product from our catalog.
Can I personalize a product for my customer?
It depends on whether you offer customization or personalization service in your online store. When orders for personalizable/customizable products come in, PODpartner's Custom Layer feature can help you quickly identify and process them. Click here to learn how to use Custom Layer.
Another option is to create a new product according to your customer's request and manually place an order on PODpartner. This approach is less efficient than using Custom Layer.
Can I add other brands’ logo and visual elements to my product?
Make sure you follow logo copyright guidelines when you're designing a product. Using a trademark or logo created by another artist or company on your product without permission is considered intellectual property infringement and could get you into lawsuits. On the other hand, your product may get flagged and removed due to the content policies of the platform where you sell.
We encourage creativity and personality on the premise of originality and respect for the law. Please keep in mind that you are solely responsible for the content in the print and embroidery files you upload. Any print and embroidery pertaining to the following content violations may be reviewed or removed permanently.
How can I delete products from a store?
To effectively remove a listing, you must delete it from your online store. If you remove a product only from PODpartner, it means that any retail orders for this item will not be imported to PODpartner, but the listing will remain active in your store.
How can I change a product’s retail price?
1. Go to Dashboard > Stores;
2. Choose the online store where the product was published and find the product;
3. Click the "Edit price" button to change product price;
4. After editing the price, click the "Continue to publish" button.
You can also go to your online store and directly change the retail price there, but the new price will not be synced to PODpartner. You will find the retail price on PODpartner different from what’s in your store.
It should be noted that the product that has been synchronized to squarespace can only be changed in its product price and product information on the squarespace website
What are retail price and retail shipping price?
Retail price is how much you charge your customer for your product, and PODpartner's product price is what we charge you for the garment and the printing(excluding shipping fee and tax).
Retail shipping price is the amount you charge your customer for shipping, whereas the PODpartner shipping fee is how much we charge you for shipping out your order.
The total amount you pay for your order is as below:
Order cost = PODpartner product price + PODpartner shipping fee + Tax
And the price your customer pays is:
Your product's retail price + Your online store's retail shipping price
You are free to decide how to set the retail price and the retail shipping price. If you want your customer to cover the shipping fee, you can either include this cost in your retail price or set your retail shipping price equal to the PODpartner shipping fee.

- How it works
- Shipping
- About us
- Blog
- CapabilitiesPersonalizationJumbo DTG
- Help center
 USD
USD